


Publish Website - Part 2
After we have built our website we now want to make it accessible to the world.
Now the hard part begins: Choosing a provider.
In the past I used GitLab Pages and Cloudflare as a CDN (to increase loading speed). This time I intended to use GitHub Pages but decided to use a dedicated provider instead.
Since Cloudflare has a static website hosting service so I tried Cloudflare Pages.
With Cloudflare Pages
Long story short:
Their build image v1 only supports up to Swift 5.5 and even when migrating back from 5.7 to 5.5 I didn't get the pipeline running.
On every build one file at the end of all build steps had been modified while building. It wasn't always the same file but there was always this error.
error: input file '/opt/buildhome/repo/.build/checkouts/splash/Sources/Splash/Syntax/SyntaxHighlighter.swift' was modified during the builderror: input file '/opt/buildhome/repo/.build/checkouts/splash/Sources/Splash/Syntax/SyntaxHighlighter.swift' was modified during the buildError building Swift package
I hope they fix it with their build image v2.
With Netlify
As of this writing the default Swift version of Netlify is 5.4.
So we need to choose whether we want to have faster (more) builds but use a older Swift version or use the latest Swift.
I prefer newer Swift version so I ran echo '5.7' > .swift-version to tell Netlify to install Swift 5.7.
Next we need to create a Netlify account. Then we create a new site and import the existing project from Github.
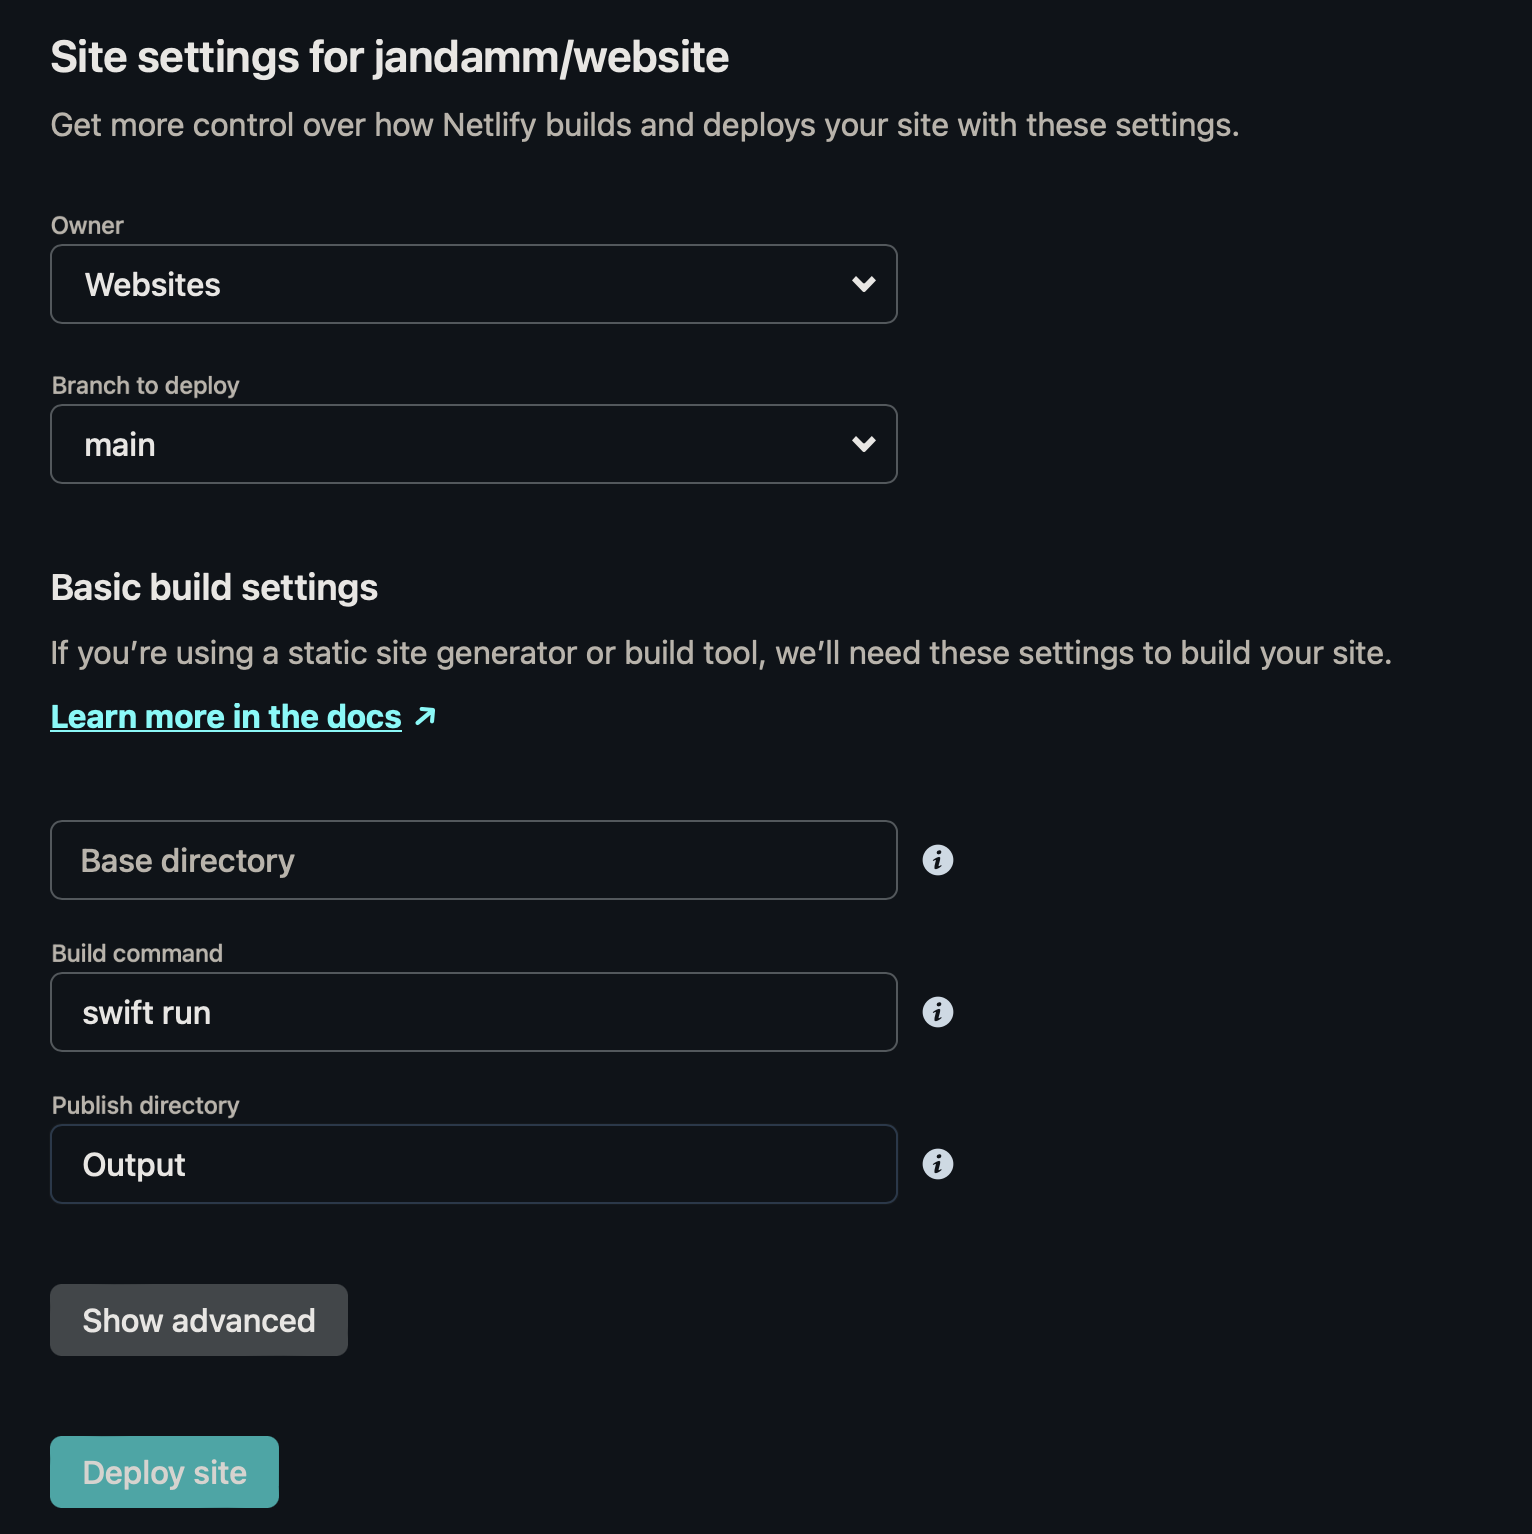
About one minute later we can reach the site at a random url.
In Site Settings we can change the name to something more memorable.
With our own domain
We need to register a domain if don't have one already.
I use do.de which I can recommend. Otherwise just search for a "domain registrar" and you'll find plenty of options.
In the next steps we need to create DNS entries for our website so our domain points to the server where our website is hosted.
I use Cloudflare for DNS entries since they can proxy (cache) your site to reduce traffic and give some basic stats about your visitors.
It's not recommended to use Cloudflare proxy (caching) for Netlify. Neither Netlify nor Cloudflare say its safe to do.
I also noticed some issues when enabling proxying so I've disabled it.
Creating DNS entries without proxying isn't an issue.
Configuration
We need to go to the Domain Settings of our project and Add a domain.
Now we enter our domain and confirm it twice.
This could be jandamm.de or speechy.jandamm.de.
DNS entries
On Cloudflare we select our domain and go to DNS.
If we chose a subdomain:
CNAME speechy project.netlify.app
If we chose a domain:
CNAME @ apex-loadbalancer.netlify.com
CNAME www jandamm.de
The first CNAME is a flattened CNAME - also known as ALIAS. This is not a official DNS entry format.
By definition only subdomains can point to other domains. Domains need to point to an IP-address. This is what flattening does for the CNAME so it's a proper A entry.
And turn off Cloudflare Proxying as this is not encouraged by neither Cloudflare not Netlify.
Next
I'm not that happy with my current setup.
While 100GB/month is quite a bit of bandwidth I do prefer no limit at all. Cloudflare also comes with Auto Minify, DDoS protection and much more.
Ideally I would just fully migrate to Cloudflare Pages but I didn't get the pipeline up and running.
So I will migrate to GitHub Actions for CI/CD and then push the output to Cloudflare Pages.